


Selasa, 19 April 2016
Shop Tour Mike Pekovich Part II
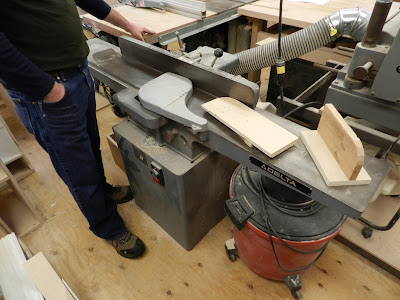 |
| The trick to shop layout is to be able to get lumber onto and off of your equipment. |
 |
| This is the kind of shop furniture Mike builds. |
 |
| Its hard to clean the shop with this many woodworkers in it. |
 |
| Only two routers Mike? Why? |
Sabtu, 12 Maret 2016
Petersburg MI the glass doors part II
One of the things I also like to do on doors is to run the edges through the jointer. This evens things out better and eliminates some sanding. Now I can start to stain and finish them...

Selasa, 09 Februari 2016
Designing a Box Part 2
It has been a busy week or so, but I’m finally getting back to this box design.
To reestablish the premise in this exercise, I want to improve my furniture design skills and to do that, I’m going back to the basics. I am attempting to design a basic box that has no specific purpose, researching the rules of furniture design and testing them as I go along.
In the past post I discussed the Golden Rule of Ratio, or Phi, and tested the concept using some simple outlines drawn to scale. The result was respect for the rule while not committing to using it exclusively. Testing it in this application, it didn’t allow me to focus in on one dimension, but it did allow me to narrow down the choices.
Now that I have a few basic sizes to work with, I need to determine what to add to the design and what effect those additions will have on the results. There are two additions that must be considered; where the lid meets the body of the box and a base for it all to rest on.
I have seen some very well constructed boxes but never one with an invisible joint where that lid meets the body. Even in the finest of cabinetry, a well-hidden joint like this becomes distorted over time and it becomes noticeable. Where that line appears affects the proportions of the piece and its placement must be considered in the original design of the box. That much I know. Where that placement should be is something I have to determine.
If there is a rule regarding whether or not a piece should have a base, I can’t find it. I do know that I like the look of bases on just about everything. To me, a base gives “grounding”, especially when it is a little wider than the piece itself. How much wider is something that has to be decided but most important to me at this point is the height. Is there a rule that works that will tell me how high the base for my box should be? Let’s find out.
The Fibonacci Sequence
Researching this rule I discovered that it is a process of “creating a series of dimensions that are related by the Golden Ratio”. Hopefully, I will have more exacting results from it than I had with the Golden Ratio itself.
The Fibonacci Sequence first become known in 1202 in a math book titled, Liber Abaci which has been translated into either, The Book of the Abacus or, The Book of Calculation. Do you ever wonder about the authenticity of something like this when the translators can’t even agree on what the title means? On top of there not being a consensus on what the title of this publication means, it turns out that the author, a Mr. Fibonacci, worked under a number of aliases, being; Leonardo of Pisa, Leonardo Pisano, Leonardo Bonacci and Leonardo Fibonacci. Hey, I trust him already, don’t you?
The basis of this rule, while complicated to understand, is quite simple to execute. From my previous test I have come up with two different proportions that I have decided to work with; 14” x 8.5”, the one closest to the Golden Ratio, and 14” x 10 1/4”, the one I think best represents an emotion, in this case power.
For the first one, the Fibonacci Sequence would be as follows:
8.5, 14, 22.5, 36.5, 59, 95.5
This may appear to be a random listing of numbers but it is derived from adding 8.5 to 14, which equals 22.5. You then add 22.5 to 14 and come up with 36.5. The 36.5 is added to the number that came before it, which is 22.5, which gives you a total of 59. Add that number to the number that came before it and you get 95.5. Clear as mud, eh?
For my other choice the series would be:
10.25, 14, 24.25, 38.25, 62.5, 100.75
These numbers can be applied to a design in a number of different ways, even using them as the numerator in a fraction to develop a series of measurements based on one of the overall measurements of the piece.
So now that I have these numbers, what am I supposed to do with them?
The answer, in this particular case, is nothing. In this example only the ratios are relevant as the only dimension that we can use is the actual height of the box.
For these calculations we need to start with a consecutive sequence of three Fibonacci numbers as we are looking to divide the height by 3 for the three sections of the box; the base, the body and the lid.
Using the base three numbers of 2, 3 and 5, I come up with a value of 10, or (2 +3) + 5 = 10.
Dividing the height of the box, 8.5” by this value,10, gives me a decimal value of .85.
Now I have to multiply this value by the first value in the sequence and you end up with a value of .85 x 2 = 1.7”. This is to be the height of the lid.
Now, multiplying that same value (.85) by the second number in the sequence, and I get - .85 x 3 = 2.55”. This is the height of the body of the box.
One more time, I multiply the same value by the third value in the sequence and I get - .85 x 5 = 4.25.
If this works, the three values should add up to the height I started with. 1.7 + 2.55 + 4.25 = 8.5. Son-of-a-gun – it totals correctly.
So what these calculations tell me is that the lid should be 1.7” high while the base should be 4.25” high.
That same set of calculations for my box that has a height of 10 1/4 works out as follows:
Dividing this height of 10.25 by the same sum used previously (10) and I get 1.025
Multiplying 1.025 by 2 gives a value of 2.05. When multiplied by 3 I end up with 3.075 and multiplying it by 5 results in 5.125.
Checking my math, 2.05 + 3.075 + 5.125 totals 10.25, so my math is correct.
These calculations tell me that for this higher box, the lid should be 2.05” high while the base is a whopping 5.125” high.
I don’t know about you, but I don’t hold up much hope for this rule resulting in a pleasing display in this particular application, but lets see.

I think I can safely say that if your building a chest of drawers, Mr. Fibonacci’s trip into mathematical hell might be worth the adventure, but for my little box, I believe it is only partially right. The proportions for the lid line work very well for me, but on both there is just too much base to give the box a balance.
For this experiment, I’ll give the Fibonacci Sequence 50% out of a possible 100%.
Shaker Influence
As I cannot find a specific rule that is purported to be the “Golden” one for determining the height for a base on a box, I’ll have to turn to accepted examples from the past and figure the ratios they used to base my calculations on.
I don’t know anyone interested in furniture design that isn’t impressed by a piece of Shaker. The craftsmen of this style truly knew a thing or two about proportion and design so searching the web I came up with this example.

This particular pine painted blanket box, circa 1820, is a dovetailed example that was probably made in New York. It has a hinged breadboard lid and stands on a finely dovetailed bracket base. It is 24 1/4” high, with a width of 45 3/8”.
I chose this example because its dimensions do not conform to the Golden Ration. If created using that rule, at this height it would be just shy of 40”. Obviously, the designer of this piece made it considerably longer than he should have.
In the hopes that this particular image wasn’t distorted in any way, I brought it into AutoCAD to take some measurements from it. Using the known height, I scaled the traced image to gain other measurement, the main measurement I was after, of course, being the height of the base. Achieving that I could calculate how that height value relates as a percentage of the overall height of the piece. I recorded a height of 7 1/4” for its base, and based on the known overall height of 24 1/4”, I calculated that the base is 30% of the total height of the piece.
In the case of my box designs, using that value of 30%, the 10.25” high box would have a base roughly 3” high, while the golden rule example, being 81/2” high would have one 2.55” high. Lets see how those figures work out.

In both of these I left the lid line where the calculations of the Fibonacci Sequence told me to as I do like those proportions.
In this case, the Shakers knew what they were talking about. The base is in complete agreement with both the golden ratio developed proportion and the one that exceeds it.
The Golden Thirds
The base of this box is 30% of its overall height, which is relatively close to being one third of that overall height.
There is actually a rule out there called “The Golden Thirds”, or “The Golden Mean” which states that if you must divide up a plain, divide it into thirds, both horizontally and vertically. If you are going to place something on that plane, place it at least on one of the lines of that grid, preferably where the gridlines intersect, but if not at those four points, then at least on the lines.
So lets see what happens when we start to analyze what my Shaker friend did when he was calculating the dimensions of this blanket box.
As stated, according to the Golden Ratio, this blanket box should have a width of 39 1/4”, the result of multiplying its overall height of 24 1/4” by 1.618.
The designer, instead, gave it a length of 45 3/8”, or, in other words, he extended its length by approximately 15%.
Now going by the Golden Thirds, the base should be 33% of its overall height, or just a hair over 8”. The designer, however, only made it 7 1/4” high. This means that not only is the box 15% longer than the first rule calls for it to be, but the base is actually 10% lower than the second rule says it should be. Did the cabinetmaker that made this box not understand these rules, or did he ignore them for a reason? Lets find out.

In these four illustrations, the bottom two have used the rules covered to set the height of the lid as well as the height of the base. The two in the top row have used the rule to set the heights of their lids, but the bases are set according to my Shaker friend’s calculations.
Tough call, isn’t it. I can see a distinct difference in the proportions of the bases, especially in the box with the exaggerated proportions.
Starting with the obvious one, the one at the lower right, I believe the base is way out of proportion for the height of the box. The lid is fine, but the base, which is set by the Golden Mean, is just too much.
The one to its left, with its overall proportions calculated using the Golden Ratio and its base height set by the Golden Thirds, has a better balance between the two and tends to support the rules.
The two at the top, however, whether Golden Rule proportioned or my exaggerated proportions, have a better balance between their overall dimensions and the dimension of the base than the other two, their bases being calculated from the Shaker value.
The result of this is that I think I have developed a new rule here – “The Tin Rule”. This new rule states that a base should have a height that is 30% of the piece’s overall height. Let’s see if that one holds up for a number of centuries like the others have.
Summary
Thus ends this part of the experiment. I have learned some more interesting things about design and rules.
- The Fibonacci Sequence works well when there are a fair number of divisions in a piece, but when there are few, like on my box, it is not that helpful
- Having used this rule to determine the height of the lid, however, I have to acknowledge that it can be of some use, but only when used with caution
- The Golden Mean Rule works reasonably well in applications like this, but again, I’m not sure I would rely on it completely
- Good design is not finding one rule and sticking to it, but combining different rules to achieve balanced proportions
- Finally, my Shaker friend taught me that if you are going to distort one rule of proportions, you had better be prepared to distort the others
One other thing I have learned researching the in’s and out’s of furniture design - designing furniture is really no different than any other type of artwork. All these rules that I have come across researching this topic are the same ones that all graphic designers, architects and artists get drilled into their heads their first year of learning their crafts.
So it is back to researching the next phase of this experiment – shapes. Catch ya’ next time.
Peace,
Mitchell
